How to Throw a Super Fun Science Party!
/
For his sixth birthday, my younger son had a science-themed party. We chose a few easy-to-put-together science projects to demonstrate in a silly science show as well as for hands-on activities. The kids had a blast! Some of the projects required only a few household objects, a few others utilized kits from the fantastic website Steve Spangler Science (not a sponsor of this post :). I didn’t get great pic’s...though it wasn’t very “styled” anyway...it was all I could do to get the science projects together! A lot of research went into planning the activities, sourcing the supplies, and the flow of the party so I hope you will find this guide helpful!
Read on for detailed description of all the science activities!

Balloons in my son's favorite color were our only decorations—quick and easy!
The Activities:


1. Decorating favor bags while waiting for everyone to arrive
I bought inexpensive canvas totes from Muji and set out cups of fabric markers. (Before the party I slipped scrap cardboard inside so the pens didn’t bleed through.) I like having a quiet activity set up so that kids can work individually as they warm up to eachother. After the party, I put their safety goggles, Insta-worms (their first “experiment”), deflated windbags (see below), a toy magnifying lens, and a little treat into their bags.
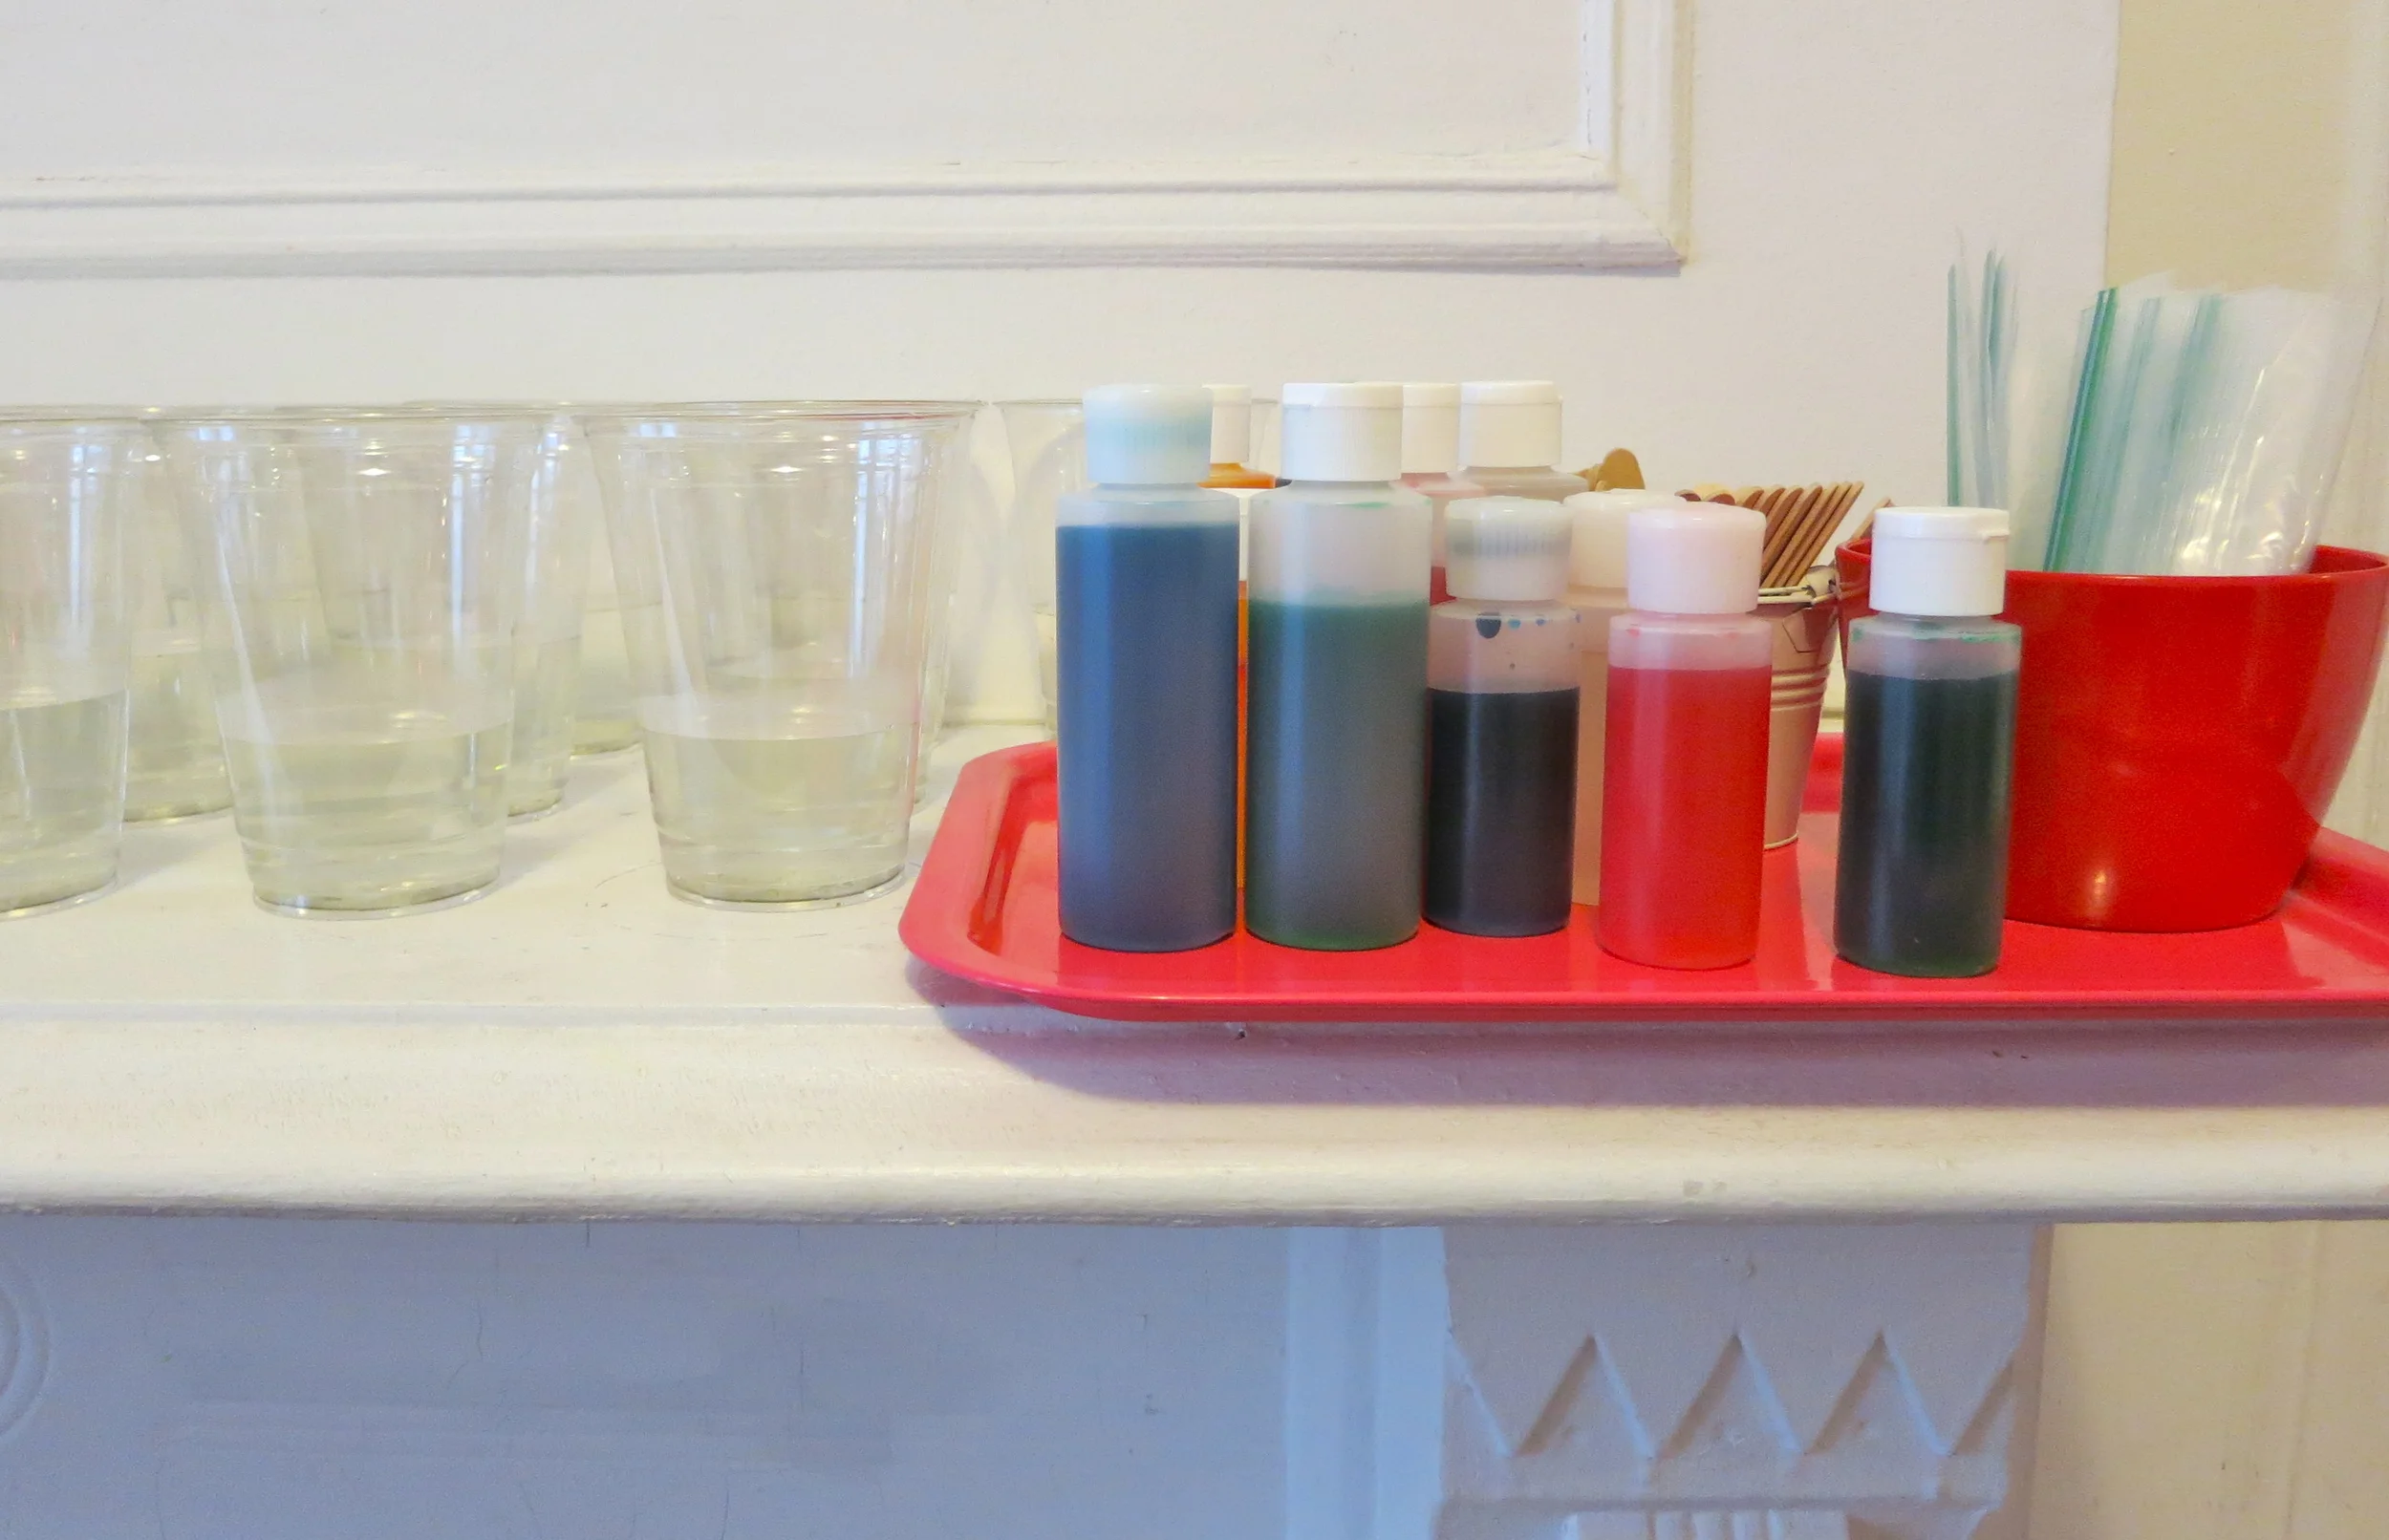

2. Insta-Worms!
Prep before the party: We ordered this kit and extra squeeze bottles from Steve Spangler Science. We premixed the activator solution and divided it into separate cups for each kid and tinted "worm goo" which went into the squeeze bottles. Cups of Popsicle sticks for stirring were set put so the kids could easily pull the worms out of the solution, along with pre-labeled sandwich bags with the kids’ names so they could take their worms home.
During the party: They shared the bottles of “worm goo” which they squeezed into their cups of activator solution and had fun pulling out their worms with the Popsicle sticks.
The lesson: The Steve Spangler website explains Instant Worms: “ Explore the science of building polymers by cross-linking long chains of molecules. The process of making Instant Worms happens the very second the two liquids mix.” Um, ok...this one was a little more complex than the others (see below). But the kids didn't care!

3. Science Show
Everybody headed out to the backyard with their safety goggles where my husband Fred demoed three different experiments-all super easy to prep and with a good WOW factor!


Act !: Self-Inflating Balloon
Prep before the Party: Pour four tablespoons of vinegar into a clean bottle. Use a funnel to fill a balloon with one teaspoon of baking soda. Be sure that the balloon falls to one side as you carefully slip its opening over the neck of the bottle so no baking soda gets into the bottle.
At the Show: Lift the balloon to let the baking soda fall into the bottle. The balloon will inflate all by itself!
The lesson: When the baking soda and vinegar come into contact, they form a gas: carbon dioxide. This gas fills the bottle and can’t escape, so it rushes into the balloon, inflating it.

Act 2: Egg in a Bottle
Prep before the Party: Peel a hard-boiled egg and set it on the neck of glass bottle. The neck should be slightly smaller than the egg. A milk bottle is a good size.
At the Show: To add to the anticipation, Fred had an extra milk bottle with an uncooked egg on the neck. He pretended that he thought he could get it into the bottle, smashed it and made a mess—which the kids loved! He then took the other bottle with the hard-boiled egg, lifted the egg, and dropped two lit matches into the bottle. He quickly set the egg on top again. As the flames went out, the egg was sucked into the bottle with a loud “POP”! The kids were very surprised.
The lesson: Before you insert the matches, the air on the inside and outside of the bottle are exactly the same. As the fire burns, it uses up oxygen inside the bottle, creating a vacuum. (You can explain that the air inside is thinner than the air outside of it and the higher pressure on the outside of the bottle actually pushes the egg in.)
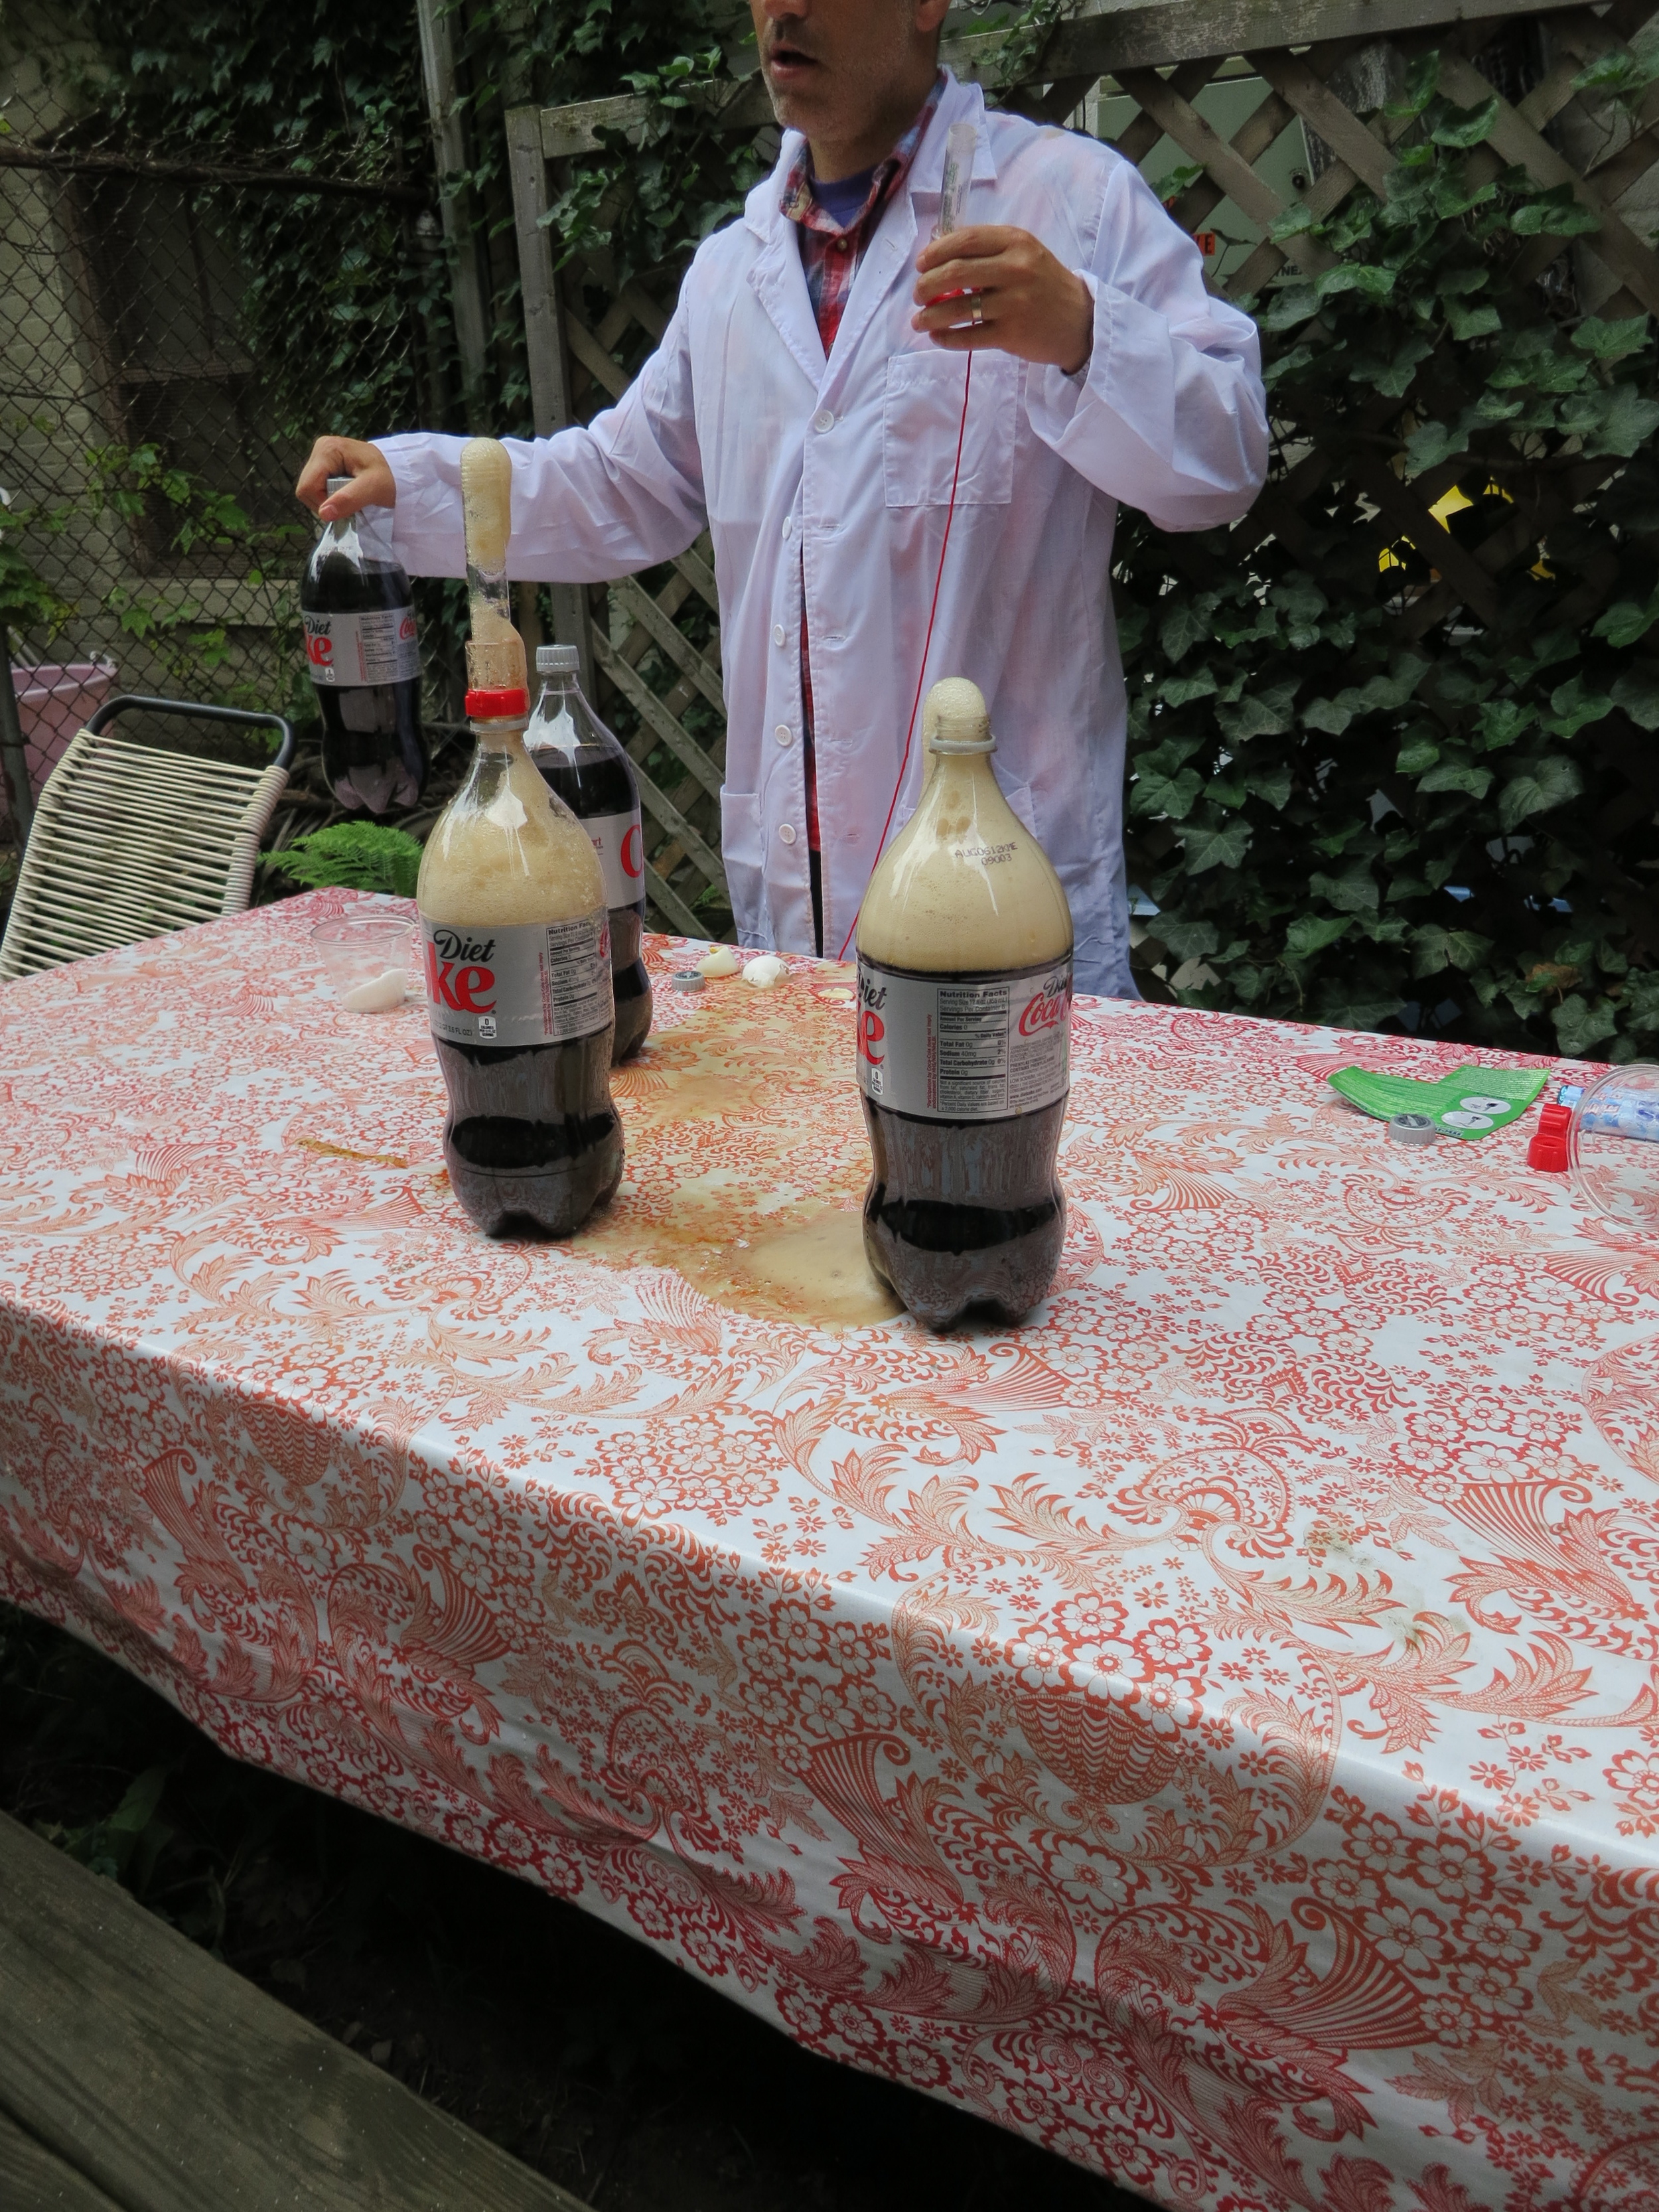

Act 3: The Grand Finale: Mentos Geyser
Prep before the Party: All you really need are a pack of mint Mentos and a two-liter bottle of Diet Coke (any soda will do but diet soda leaves a less sticky mess afterward). We purchased this loading tube from Steve Spangler which gives you more control and time to get away when dropping in the Mentos.
At the Show: Again, Fred built up the suspense (and lowered expectations—so the kids were really surprised in the end) by dropping different items into a few extra bottles of soda: grapes and salt, which each caused a bit of fizzing and gurgling. When he used the Mentos, the kids couldn’t believe it. Frothy soda shot up to the second story of our building (see picture). Fred was soaked!
The lesson: From Steve Spangler Science: “Each Mentos candy has thousands of tiny pits all over the surface. These tiny pits are called nucleation sites—perfect places for carbon dioxide bubbles to form. As soon as the Mentos hit the soda, bubbles form all over the surface of the candy. Couple this with the fact that the Mentos candies are heavy and sink to the bottom and you’ve got a double-whammy. When all this gas is released, it literally pushes all of the liquid up and out of the bottle in an incredible soda blast.” Awesome! More info here

Instead of applause…water balloons! Scientist Dad was very messy so we “helped” him clean up by throwing water balloons at him. What a great dad!

4. Windbags
After some pizza (and freeze-dancing—even scientists need to let loose!) the kids headed out again to play with these windbags that I also bought from Steve Spangler.


5. Laboratory photo booth
During the party we snapped pictures of the guests in lab coats in front of a laboratory backdrop that my sons and I painted a few days before the party. We used this app to get the photobooth effect.


We loved the way the pictures came out and sent them to all the families in their thank you notes.

The birthday boy requested dirt and worms (a.k.a. ground chocolate wafers and gummy worms) on top of his cupcakes in honor of our slime worms. We used our favorite recipe for chocolate cake. For the cupcake topper, I printed a picture of my son in his lab coat onto card stock, cut it out, and glued it to a wooden skewer. I stuck it in along with a toy magnifying lens.
These messy science were a big hit with these guys. I hope you’ll try it for your kid’s birthday!