A Fun Use-What-You-Have Craft: Cardboard Tube Sea Creatures!
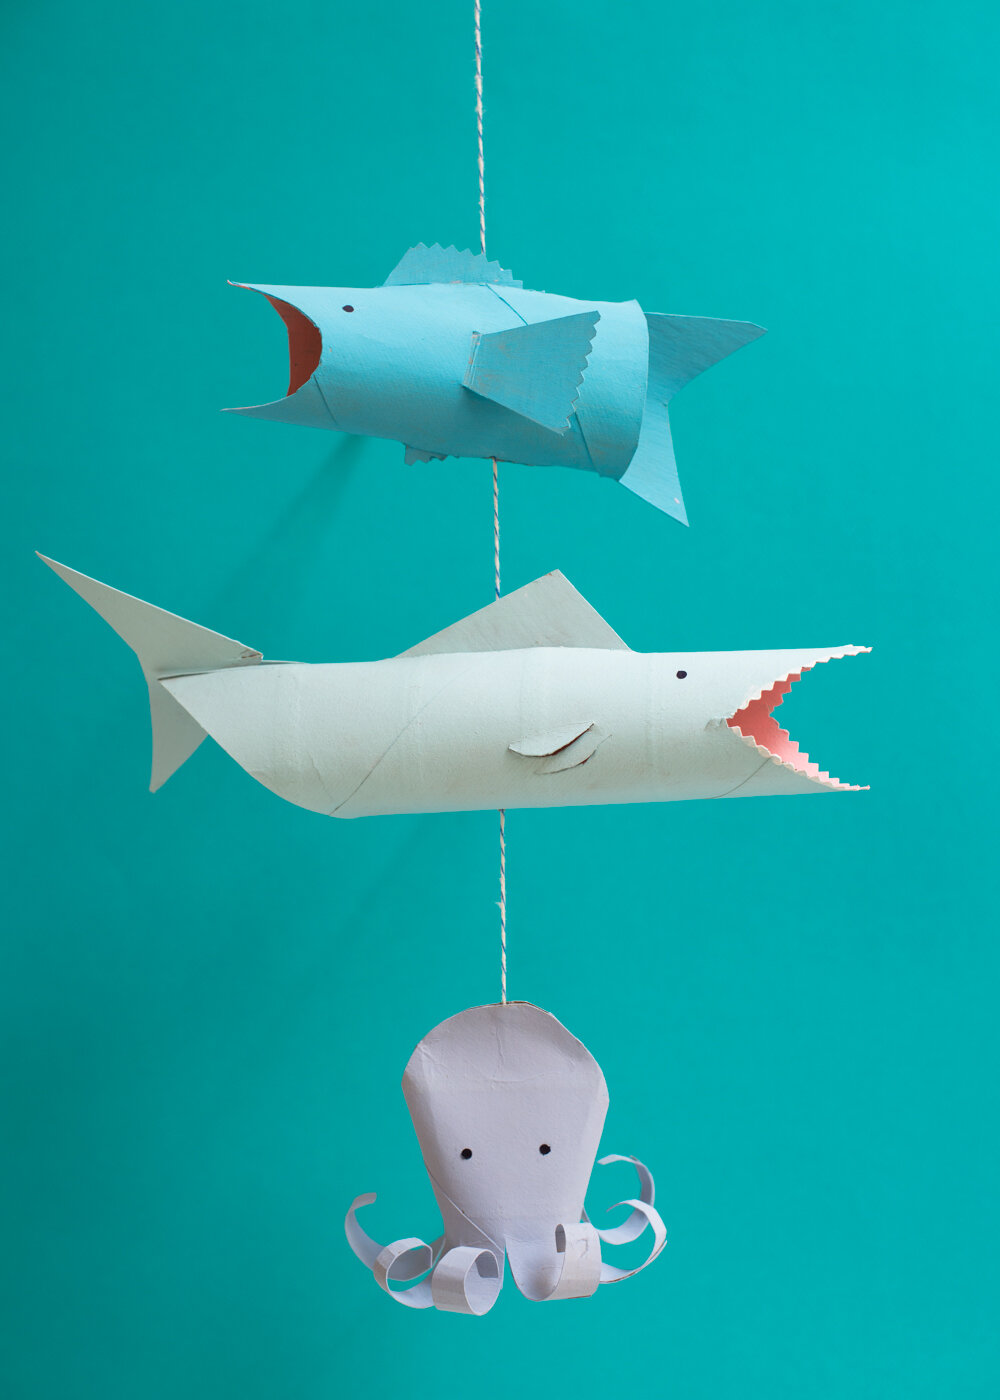
/If you’ve visited this blog before, you may know that my one of my favorite materials is recycled toilet paper and paper towel cardboard tubes. (In fact, I have written a new e-book full of tube crafts, Toilet Tube Treasury!) Never throw them away! You can make letters, holiday decorations like these, these, and these, pretend ice cream cones, annnnnd these sea creatures! They’re fun to make and can be strung together into a mobile for a cute room decoration.
Grownups can help by cutting the slits (which requires a craft knife). Using pinking shears or zig zag paper edgers adds spikiness to the fish fins and is a quick way to add a mouthful of teeth to the shark!
supplies
- paper towel tubes
- scissors
- pencil
- scrap cardboard (like an empty cereal box)
- pinking shears (optional)
- craft knife
- white glue
- paint
- paintbrush
- black paper (or a black marker)
- 1⁄8" hole punch (optional)
- large sewing needle, such as a tapestry or darning needle (optional, for stringing a mobile)
- twine (optional)
OCTOPUS
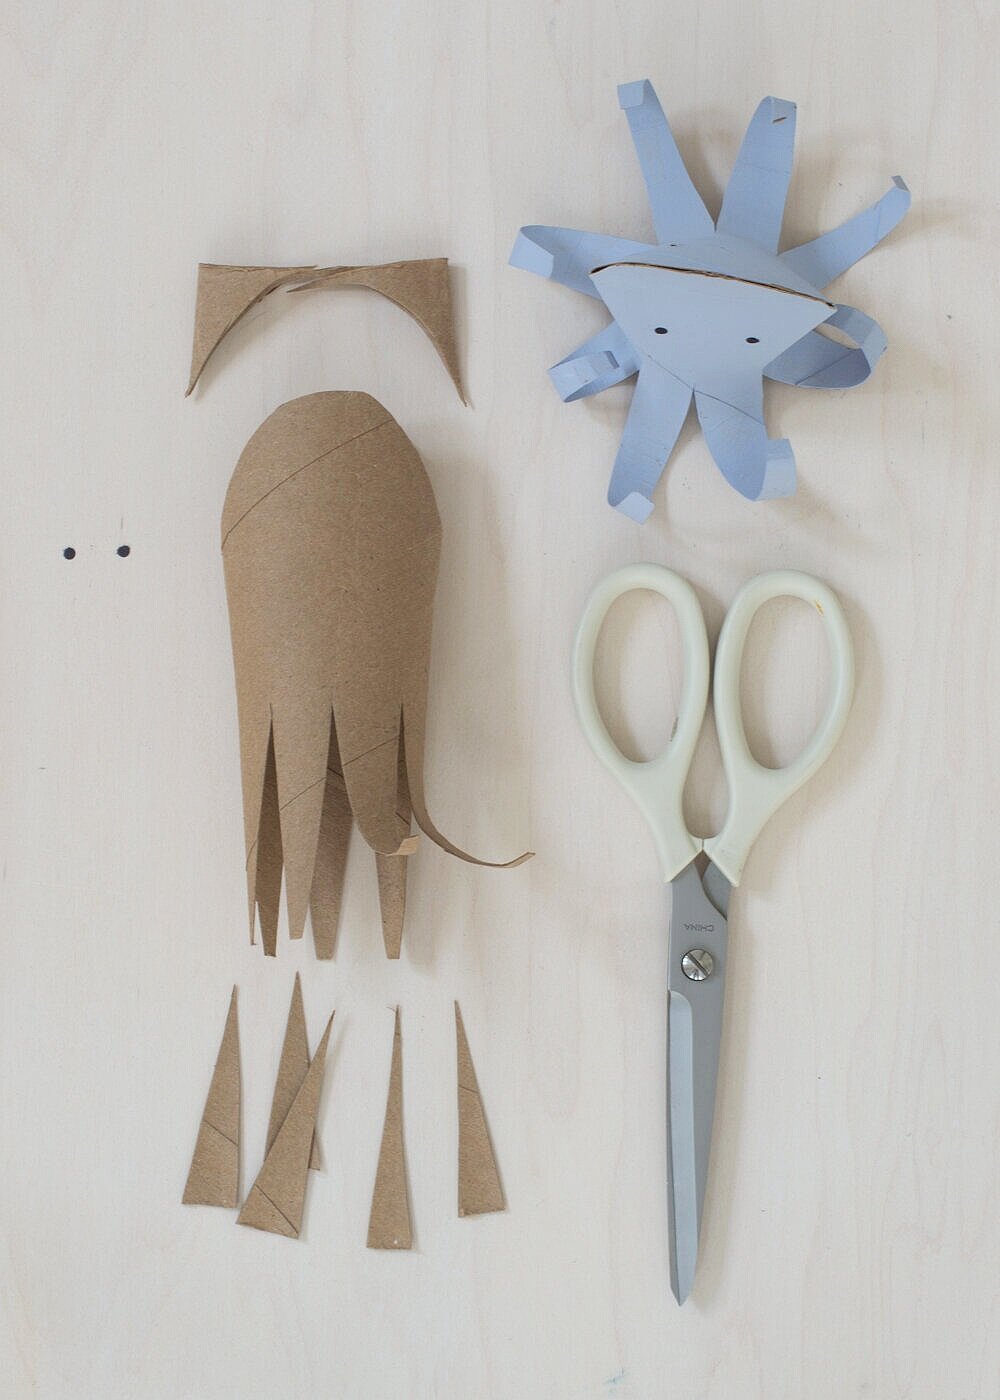
1. Cut eight tapered legs on one end of a toilet paper tube (or a cut-down paper towel tube).
2. Squeeze the other end of the tube together and cut the two sides of a rounded head at once. Open the top of the head, squeeze a line of glue on the inside edge of the top of the head, and squeeze closed again. Hold in place for a few minutes or use a clothespin or binder clip to hold it closed. Let it dry.
3. Curl the legs up, as shown, by wrapping around a pencil.
4. Paint the octopus.
5. Hole-punch black paper to make eyes. Once the paint is dry, glue or draw on eyes.
SHARK
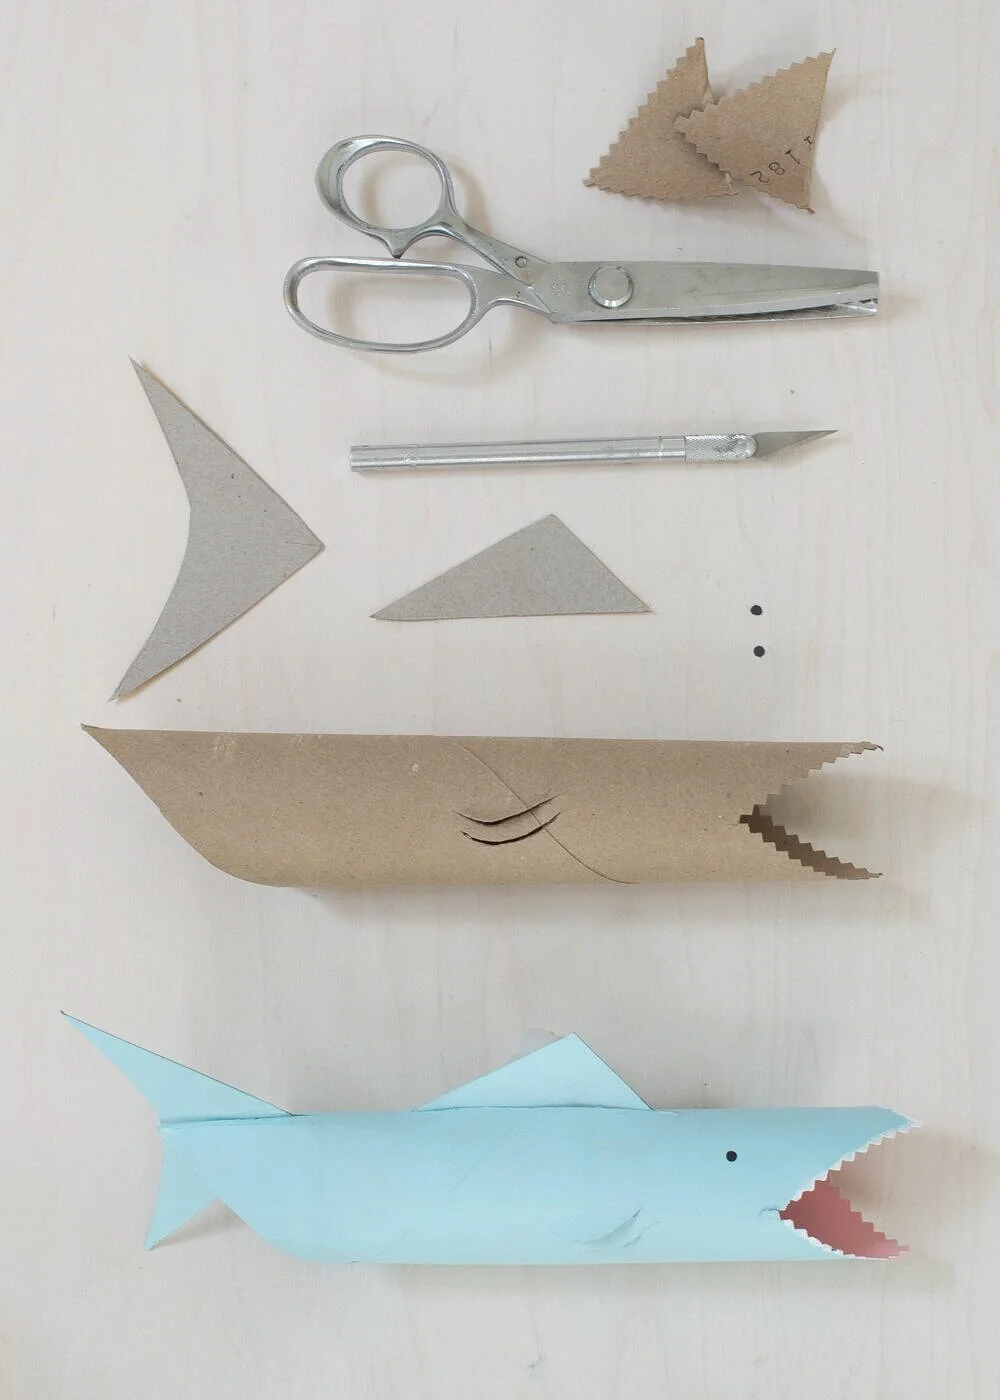
1. Cut out a basic shark shape, using pinking shears for the teeth, if desired.
2. On the scrap cardboard, draw and cut out a top fin and a tail fin.
3. Using scissors, cut slits for the tail and, using the craft knife, cut slits for the top fin and side gills. Slide the fins into their slits. Squeeze a thin line of glue where the fins meet the slits, and wipe off excess glue. Fold up the top gill. Let dry.
4. When the glue is dry, paint the inside (as far as you can reach) pink, the outside gray, and the teeth white.
5. Hole-punch black paper to make eyes. Once the paint is dry, glue or draw on eyes.
FISH
1. Cut out the fish mouth on one end of a toilet tube (or a cut-down paper towel tube).
2. On the scrap cardboard, draw and cut out pieces for two side fins, top and bottom fins, and a tail fin, using pinking shears for a zigzag edge, if desired.
3. Use a craft knife to cut slits for the fins. Slide the fins into their slits. Squeeze a thin line of glue where the fins meet the slits, and wipe off excess glue. Let it dry.
4. When the glue is dry, paint inside (as far as you can reach) dark pink and the outside blue.
5. Hole-punch black paper to make eyes. Once the paint is dry, glue or draw on eyes.
To string these into a mobile:
1. Using a sewing needle, poke a hole in the center bottom of the shark, as indicted on the template. Poke another hole down through the top center of the glued seam of the octopus head.
2. Thread the needle with a 20" piece of string. Knot it at the end, and thread it up through the bottom of the octopus, through the hole in the head seam. Gently pull the string up until the knot hits the inside edge.
3. Poke the needle into the hole on the bottom of the shark, and bring the needle up through the top fin slit. Slide the shark down the string to space it about 2" from the octopus, and bring the needle up through the bottom of the fish, in the bottom fin slit and up through the top fin slit. Slide the fish down the string so it is about 1 1⁄2" to 2" above the shark.
4. If the creatures are slipping on the string, put on a bit of glue at the top of each string hole. Let dry and hang.
Happy crafting, friends!


