Creeeeeepy Crafts and Treats for The New York Times for Kids
/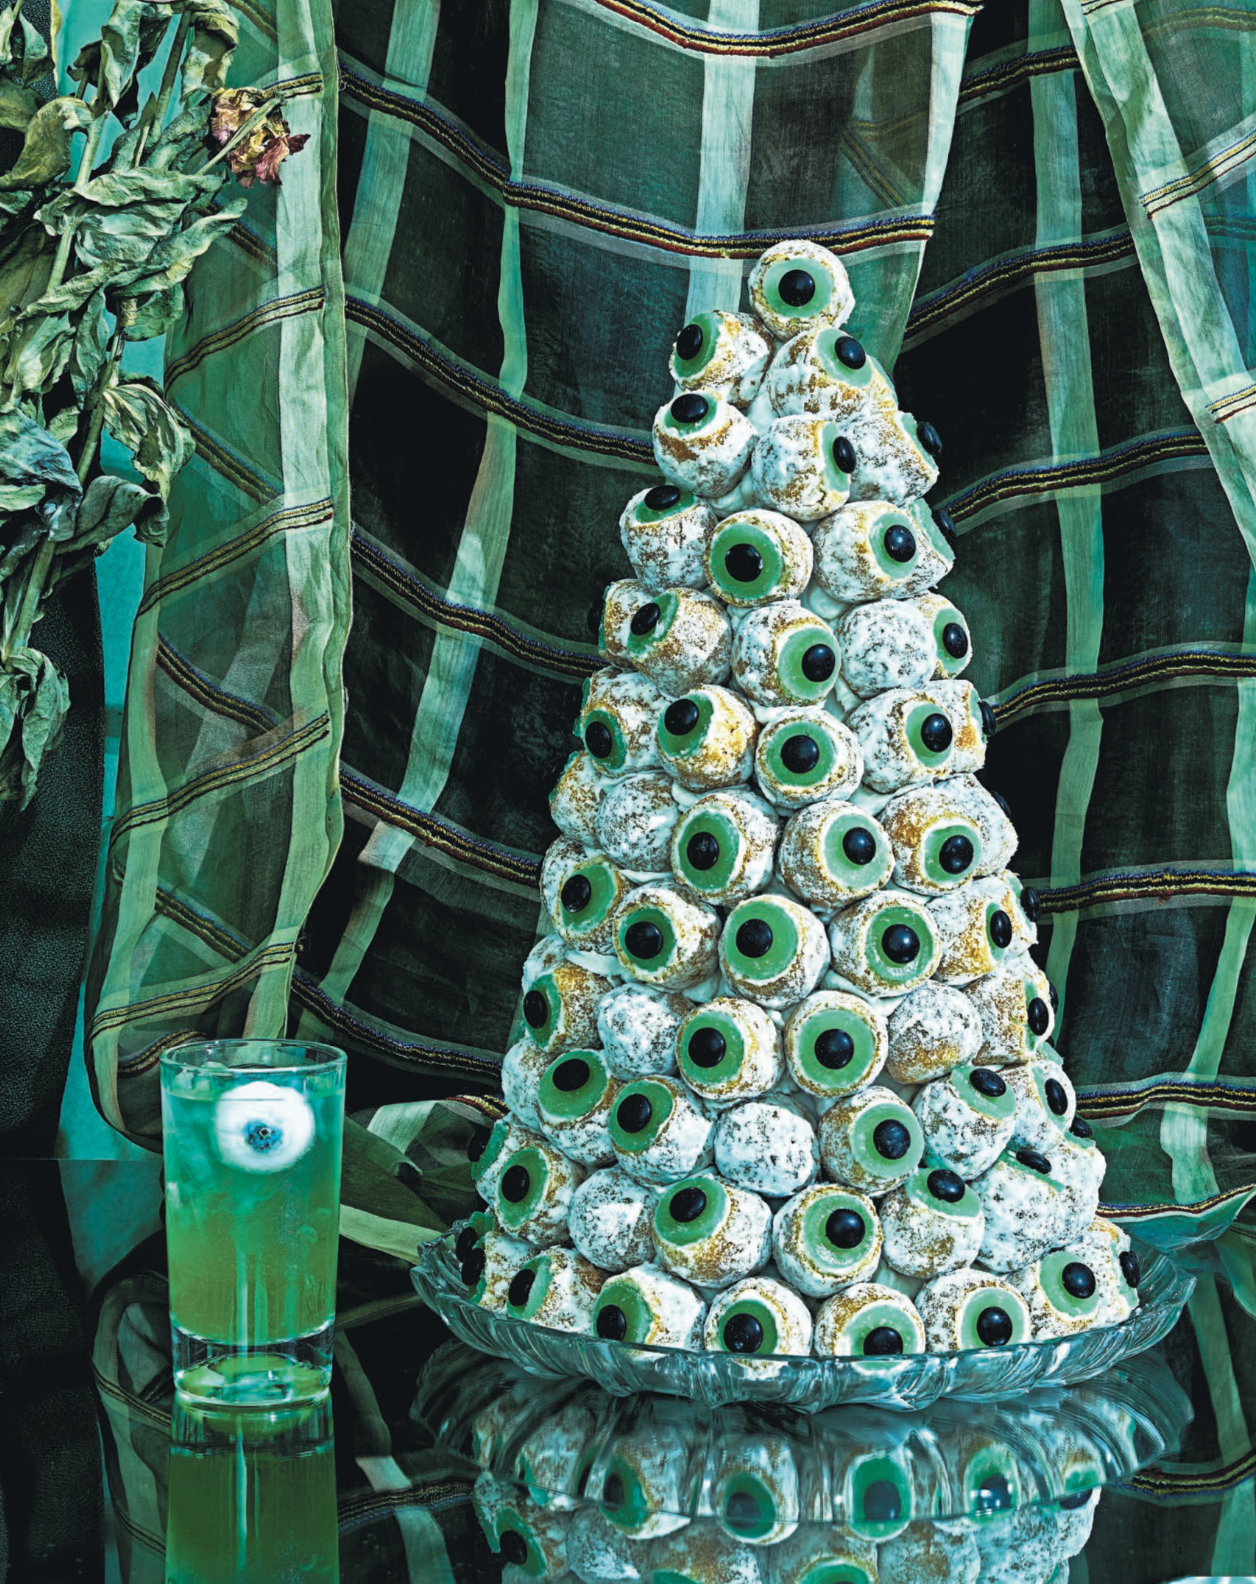
Photo by Keirnan Monaghan & Theo Vamvounakis
On the last Sunday of every month, the New York Times publishes a special print-only Kids section, and it is always fantastic! You’ll want to keep every issue, with it’s incredible writing , design, illustration and photography. This past Sunday’s issue, just in time for Halloween, was the FEAR issue, featuring “a lake full of bones, how fear drives the economy, why the news is scarier than a horror movie” and more. I was thrilled to contribute a few creepy crafts: donut hole eyeball croquembouche, a lychee eyeball drink, shrunken apple heads, and DIY scorpion costume!!
A croquembouche is really a traditional French dessert made up of a stacked cone of pastry puffs. Our Halloween take is a stack of store-bought doughnut holes transformed into human eyeballs! I built our tower of eyes around a homemade poster-board cone, but you can skip the cone and make a smaller tower by simply stacking your doughnut holes in a pyramid. If you do, make sure to ‘‘glue’’ the bottom layer to a plate with frosting to stabilize it.

Here I am putting the finishing touches on the tower at our shoot!
INGREDIENTS
Green gumdrops
Black candy-coated chocolates
Store-bought powdered-sugar doughnut holes (We used 109, but you’ll only need about 39 for a smaller self-stacked tower, see tip below.)
Knife
White frosting
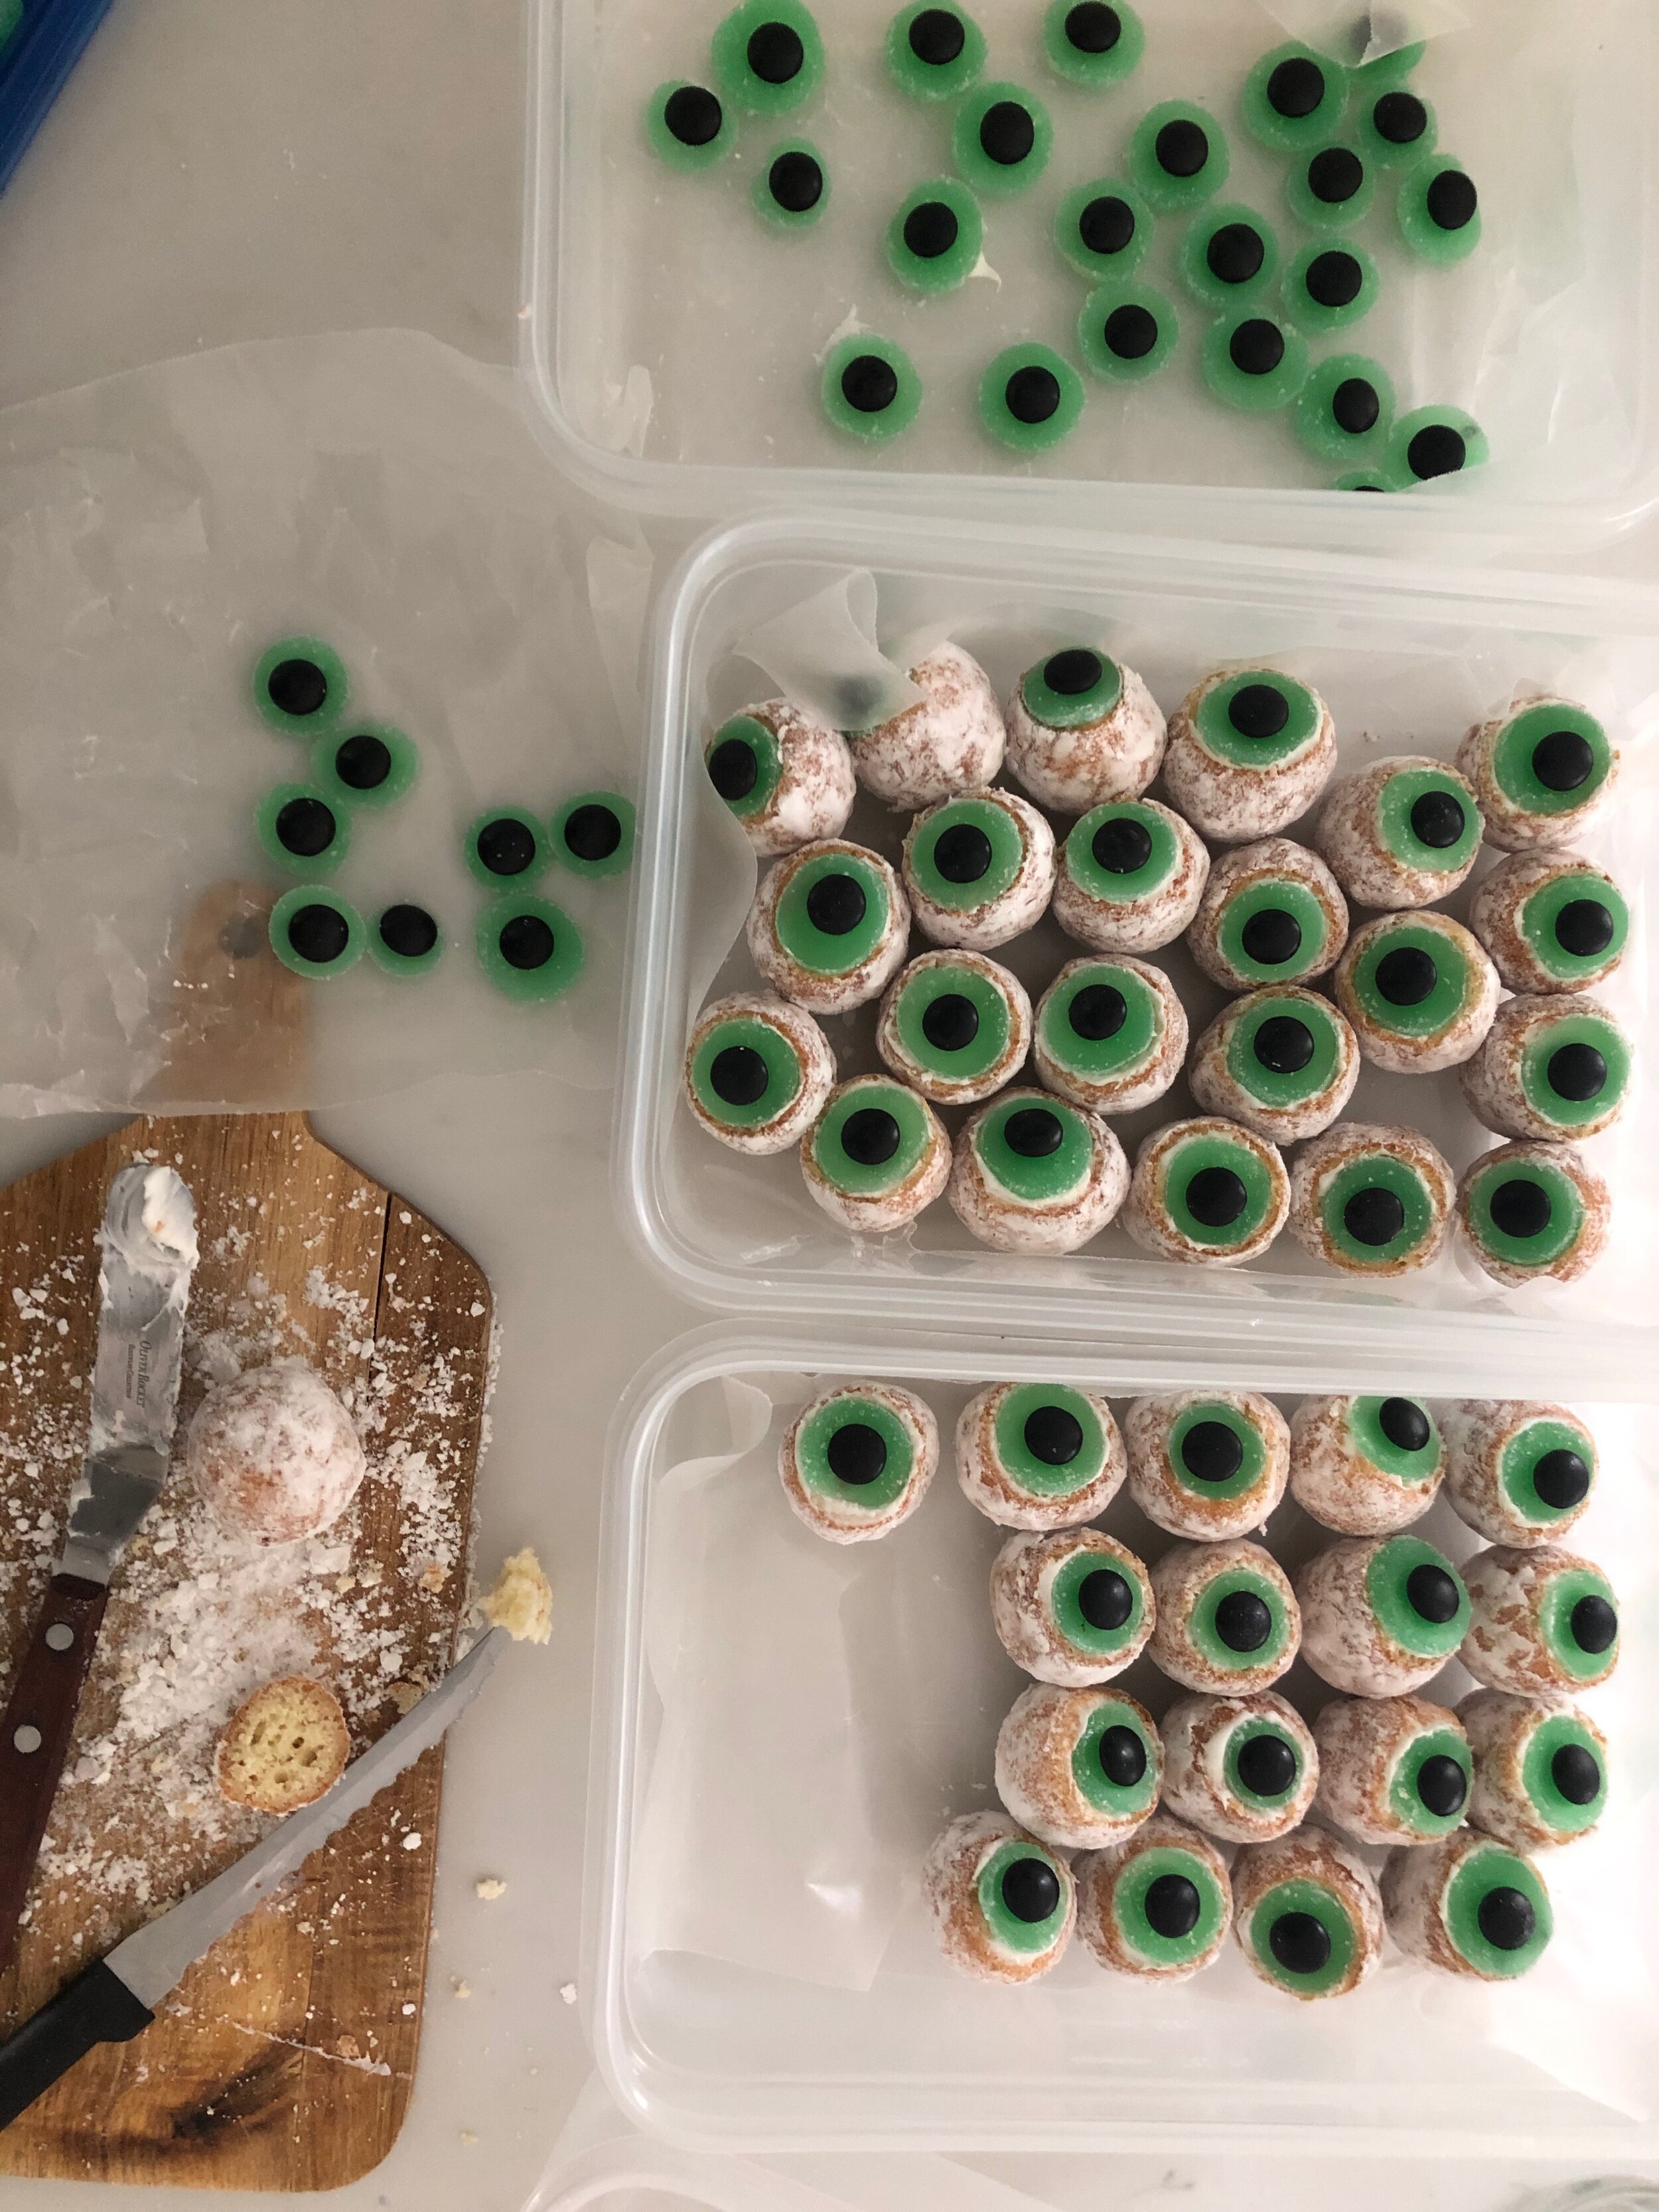
1. For the irises: Slice the gumdrops along the flat side to create 3 circular slices or ‘‘irises.’’ Press a black candy into the center of each gumdrop slice to create a pupil. You can leave some of the eyeballs plain, especially if you are making a self-stacked tower, because some doughnut holes will be on the inside of the stack.
2. For the eyeballs: Slice off one end of a doughnut hole. Apply some frosting ‘‘glue,’’ and press the pupil on.
3. For the tower: If you’re using a poster-board cone, place it on a serving dish. (You won’t be able to move it onto a plate after it’s covered in doughnut holes.) Apply a generous amount of frosting to the bottom and back of each eyeball, and press them into a row to encircle the bottom of the cone. Repeat with the next row until you reach the top.
4. TIP: For a self-stacked tower, glue your bottom layer of doughnut holes in a circle to the plate with frosting (the inside ‘‘base’’ doughnut holes do not need pupils). Add circular rows in descending sizes to create a pyramid.

When I was contacted to create some creepy food for the Times, it so happened that we had some fresh lychees that my son picked out from our local Asian supermarket and we had commented on how eyeball-y they are! I wound up using canned lychees which come pitted, as pitting them by hand kind of messed them up.
You can use these to make a ghoulish garnish for any drink — we used fizzy lemonade.
Directions:
Drain a can of lychees, then push a blueberry into the opening of each lychee. Place on wax paper, and freeze for 2 hours until solid. Pour a glass half-full with lemonade, add a drop of green food coloring (optional) and stir. Add ice and seltzer, then gently place a frozen lychee onto the ice!
TIP: If you have any lychees left over, you can creep out your blindfolded Halloween party guests by having them dunk their hands into a bowl of eyes!

Photo by Keirnan Monaghan & Theo Vamvounakis
Shrunken apples are a fun classic craft that doubles as a spooky Halloween decoration. No need to worry if you’re not a sculptor…there are no mistakes in apple-carving! Missing teeth, lopped-off noses and bulging eyes will only make your apple heads all the more ghoulish.
You’ll need:
Apples
Vegetable peeler
Pencil (optional)
1 cup lemon juice
1 tablespoon salt
Small paring knife (and small pumpkin carving tools, like pokers)
Skewer (or something to poke a hole in the bottom of the apple)
Twigs (bonus if they have offshoots that will look like arms!)
Mix the lemon juice and salt in a bowl. Peel an apple and soak in the lemon juice mixture for 30 seconds or so. (An optional step: draw on facial features with a pencil before soaking.)
Use your peeler and tools to carefully carve facial features, like nostrils, teeth and eyeballs, into the apple. Vegetable peelers often have an “eyer” at the tip for removing potato eyes, and they are great for making holes!)
When you finish carving, soak the apple in the lemon-salt mixture again for a minute, making sure the liquid goes into all the carved crevices.
Poke a hole into the bottom of the apple with a skewer or pointy tool and push a twig into the hole. Place the apples on twigs into a jar or vase (or leave them on a cooling rack), and wait -- it’ll take at least eight hours for shriveling to begin, and your apples will become more and more wrinkled as the days pass.
TIP: For a quick-shrink option, before inserting the twig, set the apples on a cooling rack (for air circulation) on top of a baking sheet and place in an oven set to 145 degrees for 8 or more hours. (You can turn the oven off and on as needed and restart the drying process, but make sure you never leave it unattended.)

These are a few of the apples that my family and I made over the course of a few weeks..including some made with the quick oven-dry method described above!

Dressing up as something that frightens you is one way to help you face your fear. Or, at the very least, to help come up with a creative costume idea! For the special FEAR issue we were inspired by arachnophobia, a fear of spiders. Even scarier are spiders’ arachnid cousins, like the scorpion costume I designed (and was beautifully illustrated by Francesco Francavilla).
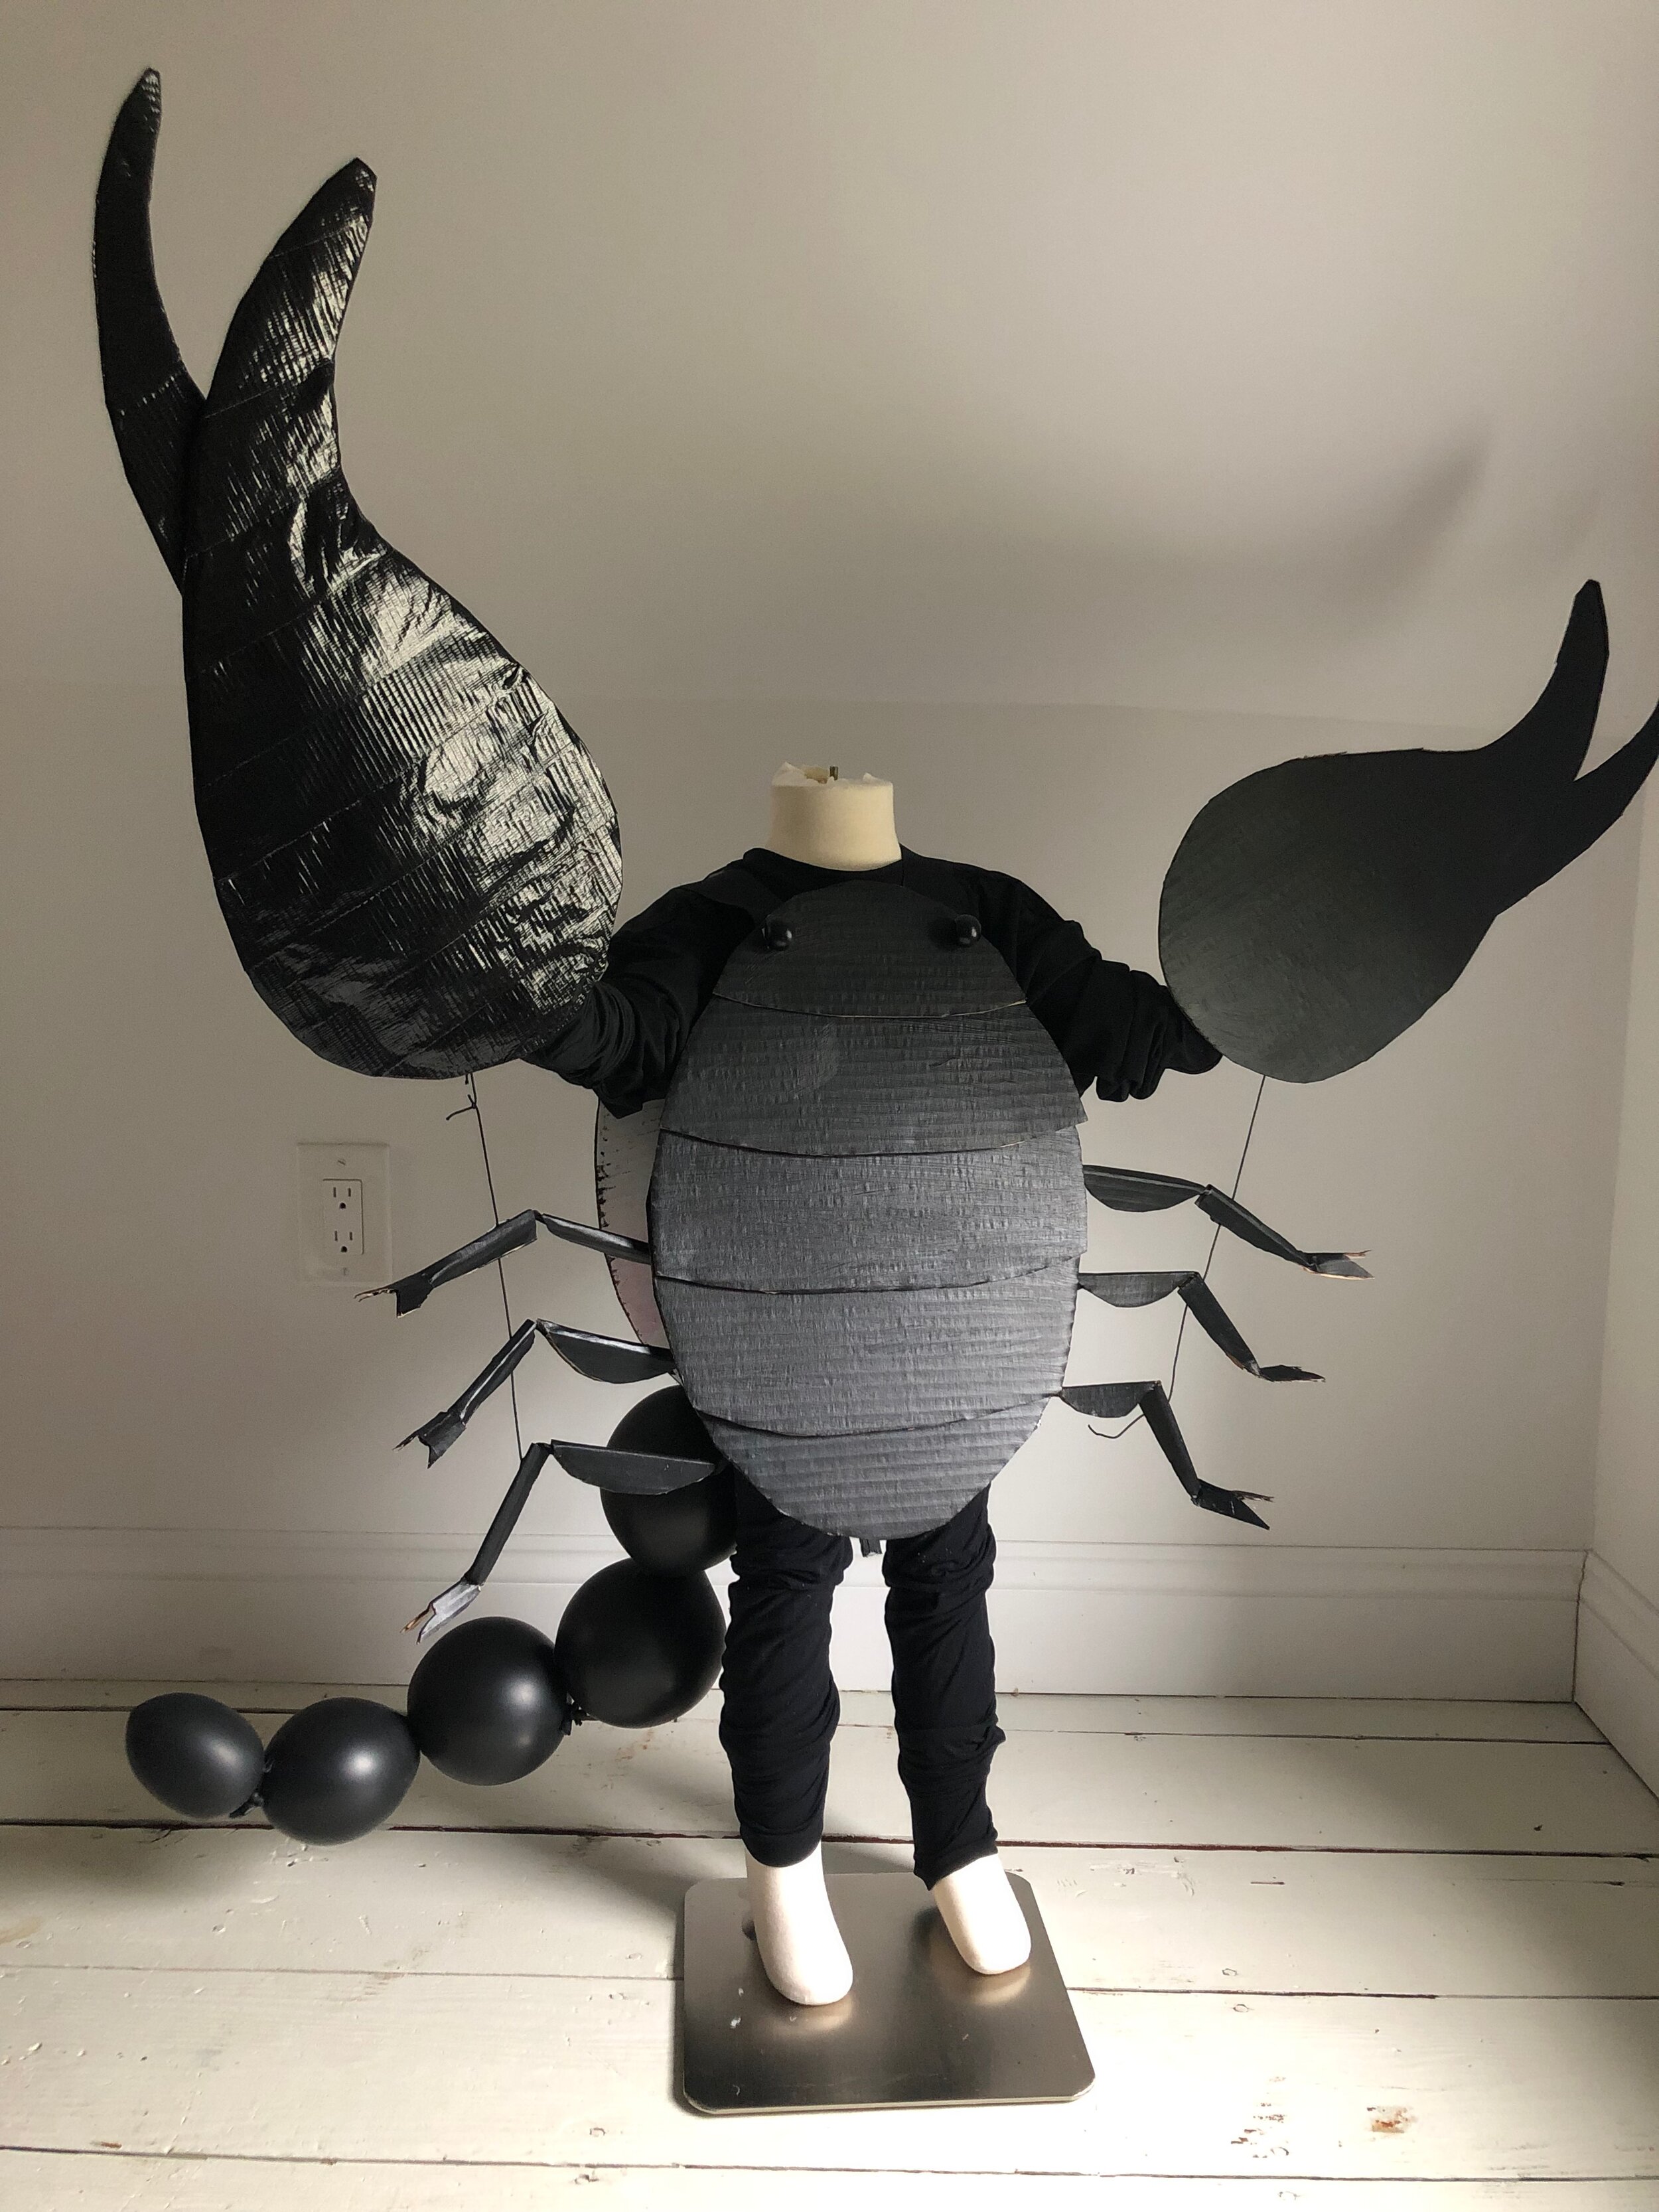
Here is my 3D sketch of the costume!
You’ll need:
Cardboard
Hot glue
Large black beads (optional, for eyes)
Wide black ribbon or duct tape
Black craft paint and paintbrush
Thin black ribbon
Black elastic cord or string Black balloons
Adhesive dots
Black pants and long-sleeved T-shirt
1. Torso: Cut 2 oval pieces of cardboard for the front and back of your torso. (Optional: Add cardboard strips to the front piece to add dimension.) Paint them black, and hot- glue ribbon shoulder straps to both pieces. Hot-glue black-bead ‘‘eyes’’ near the straps. (When you put the costume on, secure the torso pieces to your shirt with duct- tape loops.)
2. Legs: Cut a piece of cardboard into 2 pieces 3-4 inches long, one shaped like a fish tail and the other shaped like an almond. Fold the pieces in half, and hot- glue them over a 14-inch-long piece of ribbon (leaving a little slack at one end of the ribbon) to make a leg. Repeat to make 6 legs.
3. Make a loop at one end of your elastic cord or string: This will go around your wrist, like a bracelet. Lay 3 legs together and glue them to the elastic cord or string, so that the legs will stay up and move together when you move your arms, like a puppet. Safety- pin the slack end of each ribbon to your shirt. Do the same with the other legs on a 2nd piece of string.
4. Pincers: Cut 2 large claws out of cardboard. Paint black or cover with black duct tape. Hot-glue a ribbon wrist strap to the back and add Velcro dots so you can open and close the strap.
5. Tail: Inflate 5 black balloons in descending sizes. Knot the balloons together (or use adhesive dots) to create a tail, and attach the large end to the back torso piece with duct tape.
Don’t forget to mark your calendars for the last Sunday of every month to pick up The New York Times for Kids special section!**
Have a creep-tacular Halloween!!
**This is not an ad, just advice from a fan! :)