More Wintry Candy Crafts To Try With Your Kids!
/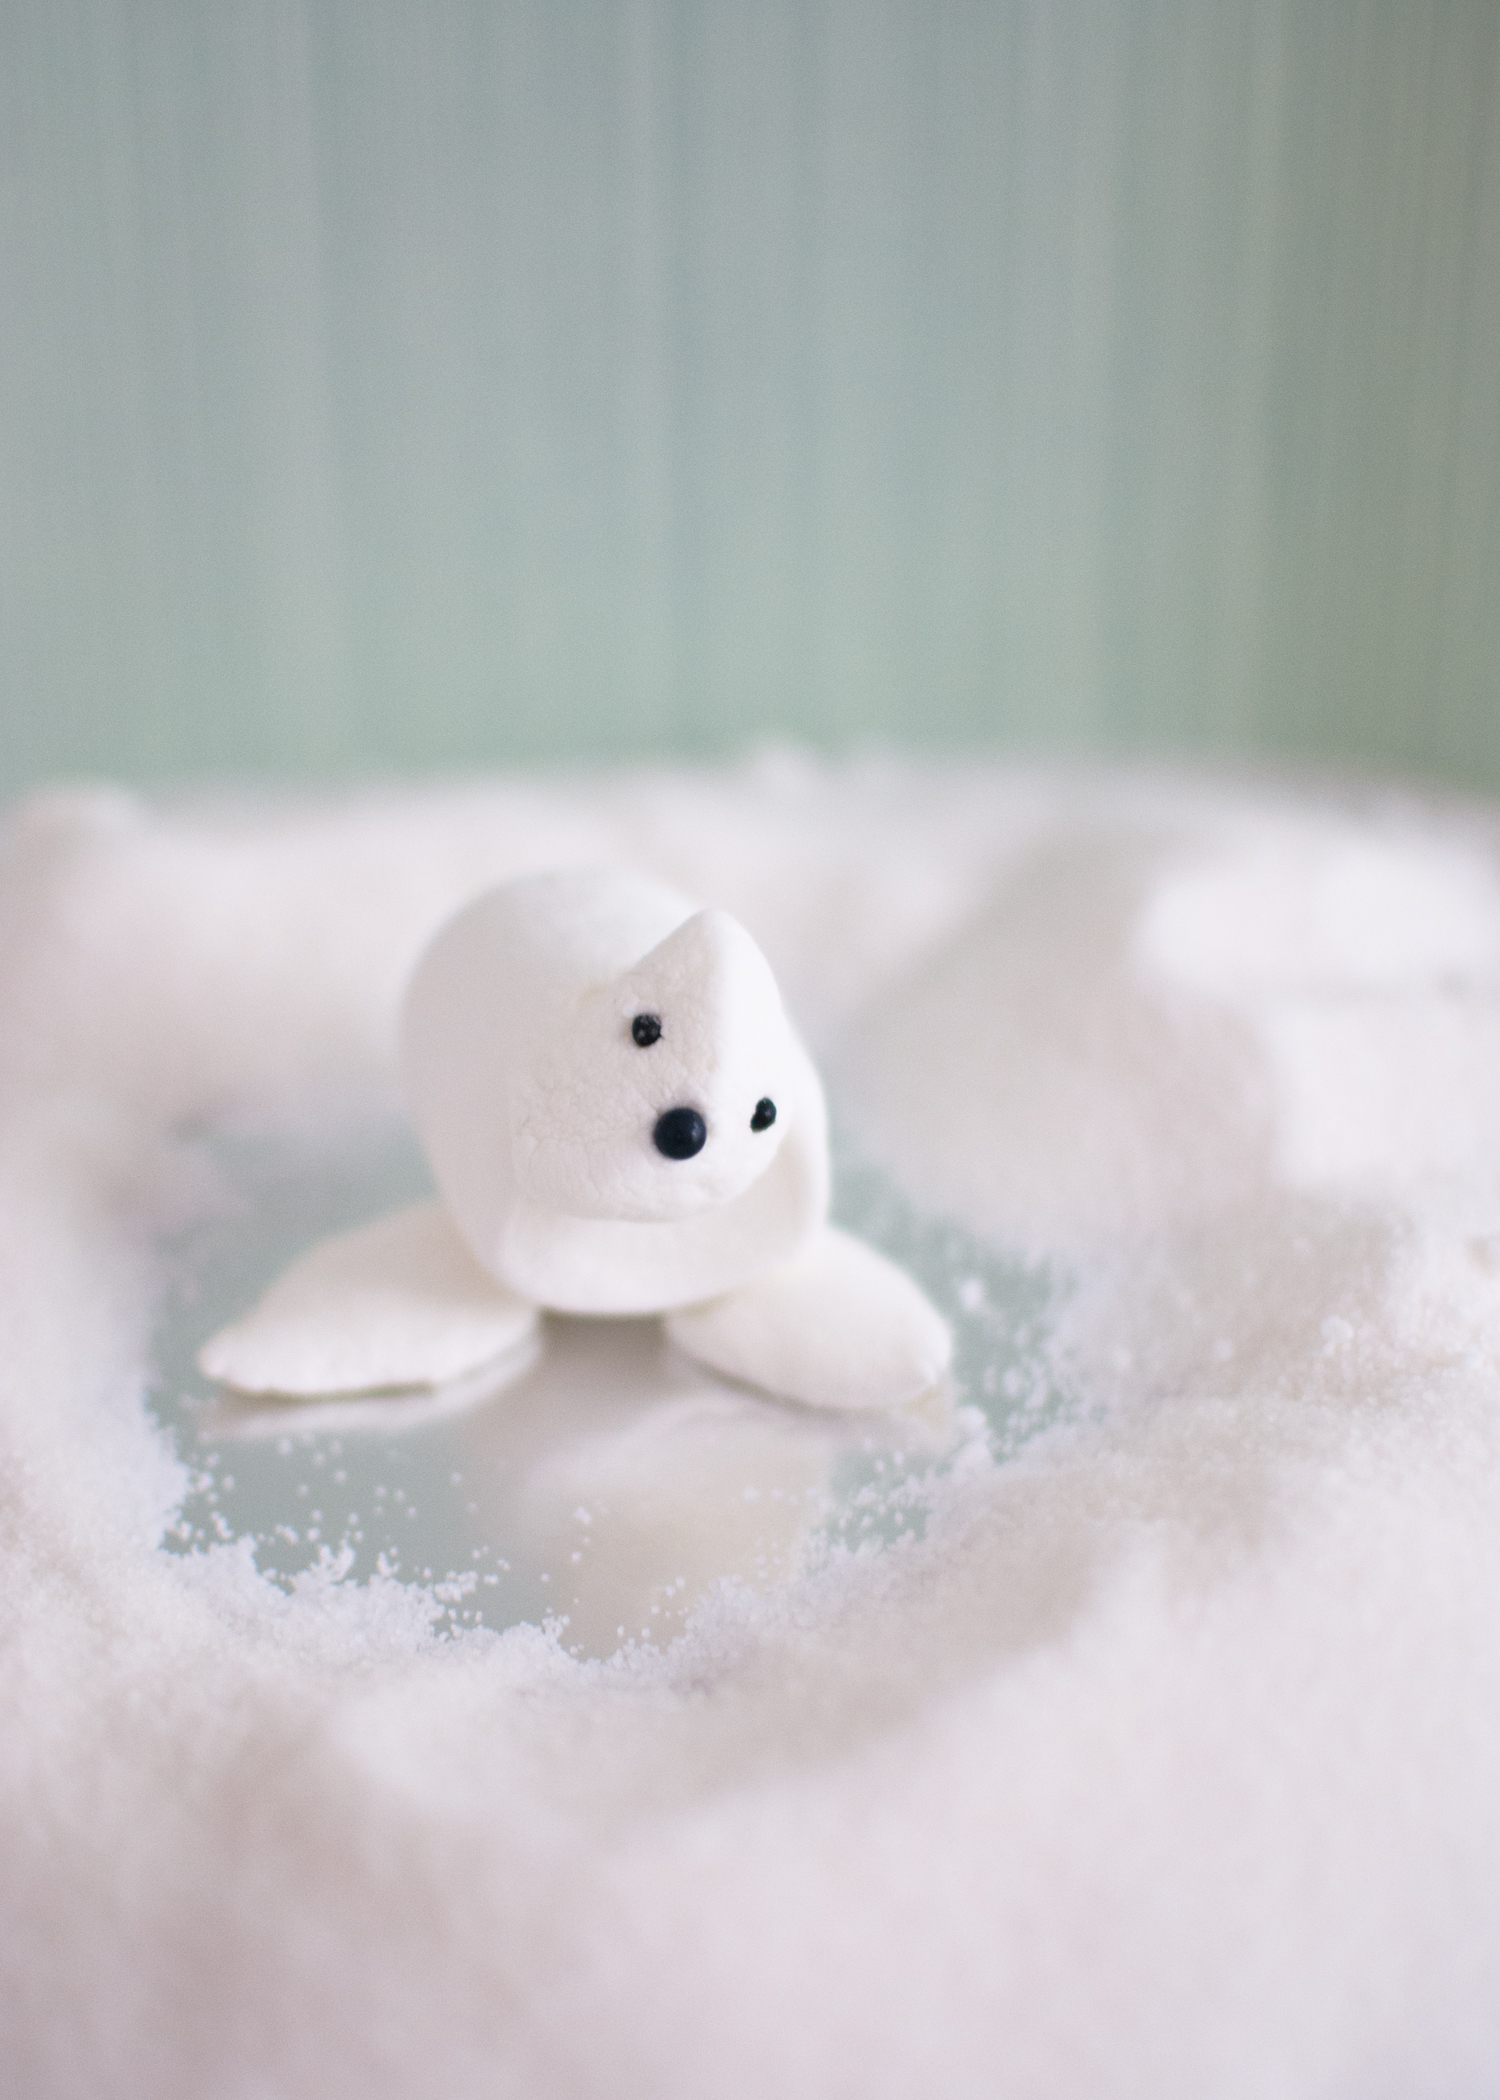
This little seal is a favorite from our book, Candy Aisle Crafts. That sweet face! In this shot, he is sliding around on some (aluminum foil) ice surrounded by sugar "snow". You can see him here atop a delicious chocolate cake along with some other arctic friends, along with the penguins below.
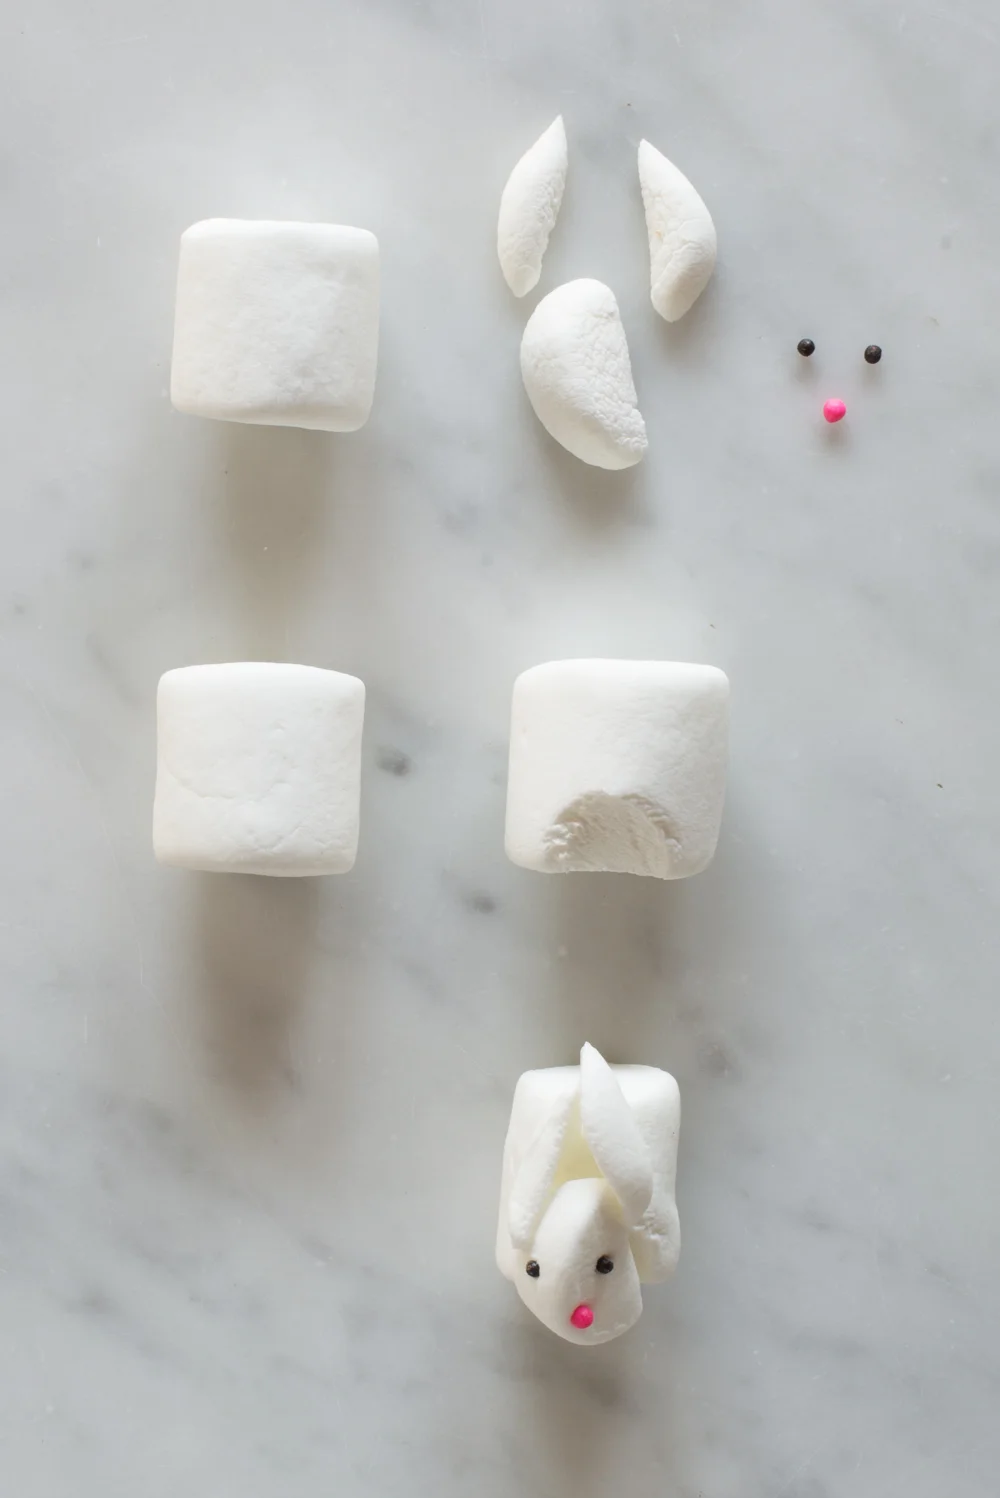
This how-to photo is actually for the marshmallow bunny in my book. But the seal is made using the exact same (easy!) technique (see the finished bunny here), except you skip the ears and add flippers, per the instructions below.
SEAL HOW-TO
supplies
scissors
3 regular marshmallows
toothpick
3 black nonpareils
1. To make the head, cut off a fat piece along the rounded edge of the flat bottom of one of the marshmallows, as shown.
2. To make the face, using the toothpick, poke two holes for eyes and one for the nose. With the now-sticky toothpick, pick up the black nonpareils and push them into the holes.
3. To make the flippers, cut two flat triangles off the long sides of the second marshmallow. Cut away at the flatter short edge to reveal stickiness. To make the body, cut away a scoop on the edge of the remaining marshmallow, as shown. Press the head onto the marshmallow. (Cut away more of the body marshmallow, if needed, to adhere the head.)
4. Press the flipper pieces to the sides of the torso. (Dust the cut bottoms of the flippers with confectioners’ sugar if their stickiness is a problem.)
5. Display the seal on an aluminum foil “lake” surrounded by sugar snow, if desired.

I call the cake that I topped these penguins with "arctic", but it turns out that not too many penguins actually live in the very cold climates. After you make these with your kids, use it as a chance to do some fun penguin research. These guys are nestled in a little icy rock candy nook, and they seem fine with it!
PENGUIN HOW-TO
supplies
scissors
1 regular marshmallow
2 black gumdrops
toothpick
2 black nonpareils
1 orange gumdrop
Optional (for a baby penguin): 1 black gumdrop, 1 orange gumdrop, 1 Haribo black raspberry candy
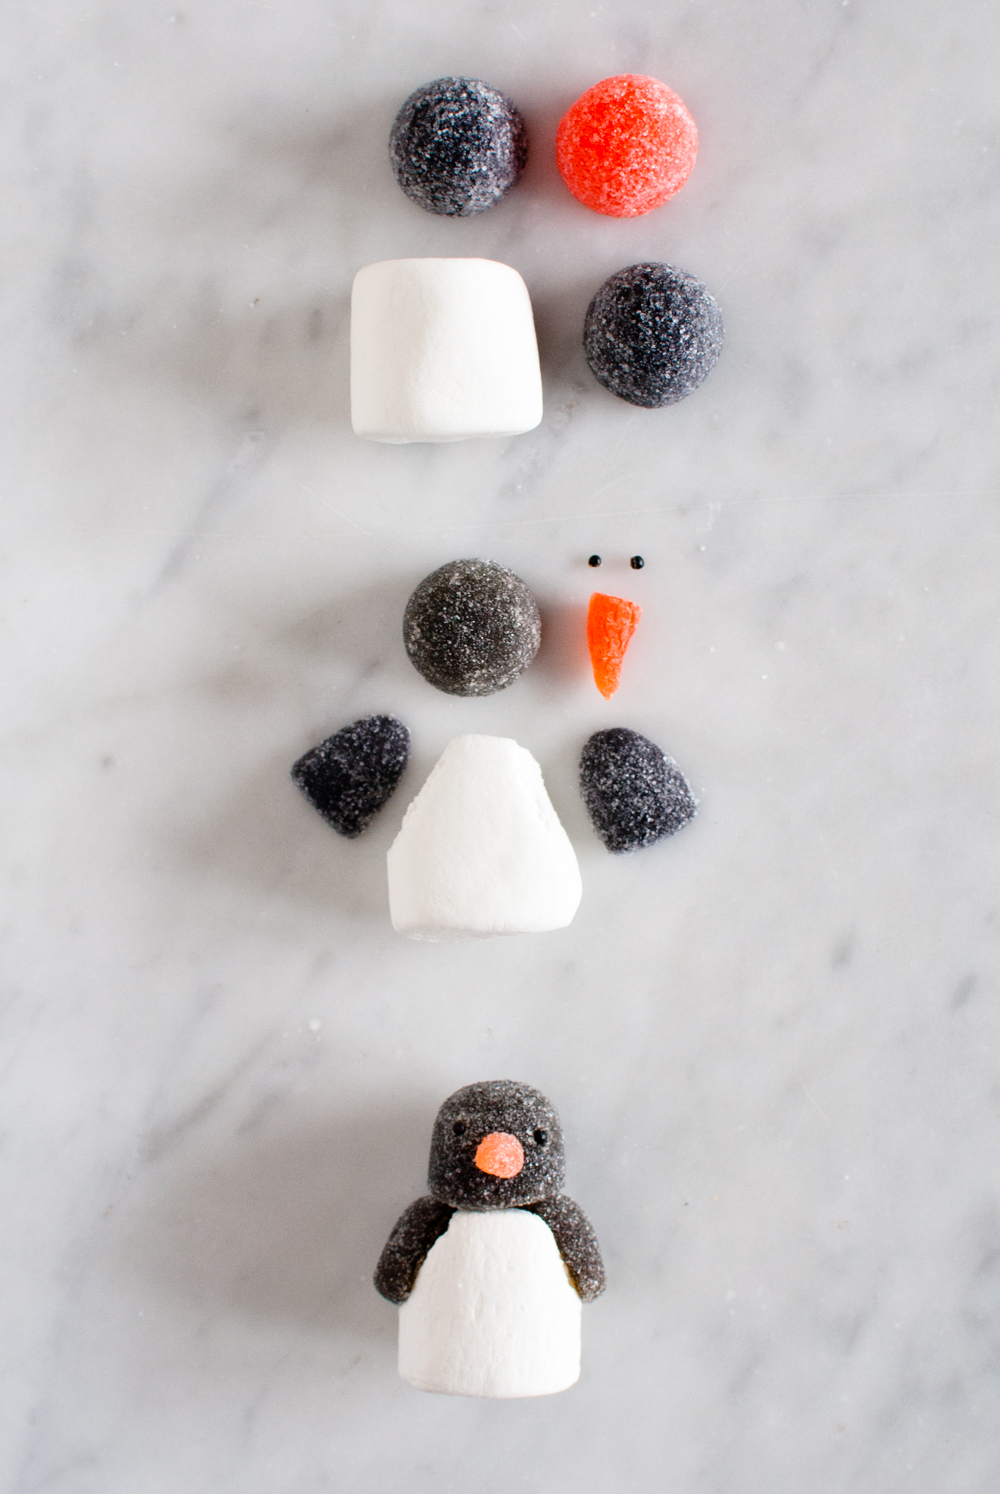
1. To make the mama penguin torso, cut a sliver off the flat top of the marshmallow where the head will go. Cut two angled sides where the wings will be adhered.
2. To make the head, on the side of one black gumdrop, using the toothpick, poke two holes for eyes. With the now-sticky toothpick pick up the nonpareils and push them into the holes.
3. Cut an angled piece off the side of the orange gumdrop for the beak. Roll it between your fingers to make it pointy. Cut a sliver off the back of the beak so that it is sticky. Use the toothpick to scrape away the sugary coating on the black gumdrop head to expose some stickiness and press on the beak.
4. To make the wings, cut two slim pieces off the side of the remaining black gumdrop. Press the pieces onto the cut sides of the marshmallow.
Note: For the penguin baby, you use one black gumdrop for the body and a black Haribo Raspberry for the head. Add the beak by scraping away some raspberry sprinkles
Don't forget to click here to see these guys and a couple of marshmallow polar bears atop a delicious chocolate cake, perfect for a winter birthday party! And pick up our book, Candy Aisle Crafts, for more marshmallow (and other edible) crafts.